
How to Get Red Wine Stains Out of Fabrics You Can’t Technically Wash:
So we’ve all been there – we’ll possibly mostly me…- but that awkward moment where you realize that you’ve splished, splashed, and spilled red wine on something else. The struggle is totally real. As a frequent contributor to the population of wine stains, I’ve done more than my fair share having to get them out. Of pretty much everything at this point… and Spoiler Alert: I’m actually really good at it. So here it is: step by step instructions on how to get red wine out of literally, everything. New chapters coming as often as I commit new atrocities, and drop me a comment if you have a stain I haven’t addressed here yet. A hundred bucks says I’ve done it and cleaned it, and I’m excited to share the odd domestic skill set only a true wino (or wineaux, lol.) would ever have the chance to cultivate. I can’t decide if I’m proud of this, but at least I can help others out of their pickles.
So this is Chapter 1 in the series I’m calling “The Red Wine Stain-Removal Bible” and it starts with garments you can’t technically wash. This particular garment is a pretty cape/shawl/scarf that my mother in law gave me. Unfortunately, it’s made out of 100% super soft alpaca/cashmere and is hardly “washable” in the traditional sense unless you want to ruin the softness forever. And of course, Go Me! I got wine on it. So here’s how I got red wine out of this, and previous “unwashables” in the past.
Step 1:
Step 1 in dealing with all wine stains is to consider what you’re working with and ALWAYS start with the least abrasive or chemically option. I tried a bunch of those Bed, Bath, and Beyond products for getting these stains out, and they were all a massive disappointment. Please don’t waste your money on some “As seen on TV” crap. A little elbow grease, patience and know how is the best way to tackle any tannin-y mess.
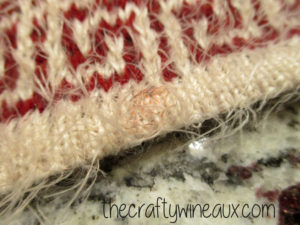
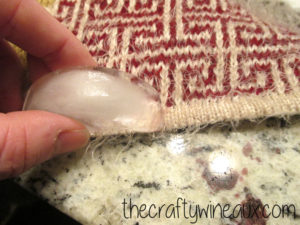
Pretty much with all red wine stains, start with ice. Especially if you caught that it happened when it did. An ice cube is ALWAYS the least abrasive option and should always be used as the first line of defense against stain-setting. The key, especially if you can’t do all the cleaning right now (like mid-party), is to get the edges of the stain to splay out – in a sense to make sure the edges blur and stop looking distinct. Don’t be afraid to set the ice cube on the stain and just let it melt there while you change and go about your party. The ice melts and splays the stain just fine without your company, lol, whereas your guests might be getting bored about now.
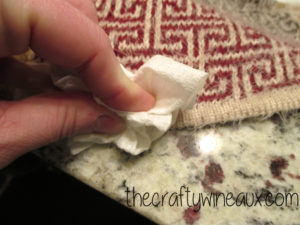
After the ice, I pressed the stain with a paper towel to lift the moisture from the melted ice – and hopefully most if not all of the wine too – out of the garment.
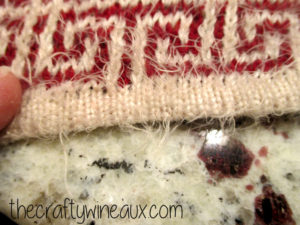
While it certainly looks better, we’re clearly not done yet. If you’re mid-party, you can totally pause here and just leave an ice cube to melt on the stain because you did enough at this point to prevent the wine from being permanent. You can do more later or tomorrow when you sober up. Life’s good, go party.
Step 2:
If you have the time to clean now and the stain isn’t gone using just the ice, move up to something a little better. Tide To Go Pens are my next step and they freaking rock. I keep them in every bag, purse, car and even in my barn stuff. They absolutely come in handy every time I get “expressive” with my hands at a gathering and inevitably get wine on others too. Order them today (they’re on Amazon if you want to click the green link) and you’ll never forgive yourself for all the years you went without them. All you have to do to use it is depress the tip and get a little liquid out, then use the marker tip to massage it into the stain.
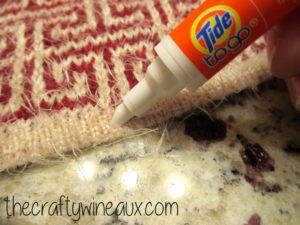
Let it be for 5-10 minutes before doing anything else. ~60% of the time, the stain fades as the Tide To Go dries, so patience is key here. Tide To Go also frequently dries in a pattern that looks like a water stain – DON’T PANIC! – Just rinse the garment under cold water then pad the stain dry-ish before letting it air dry the rest of the way.
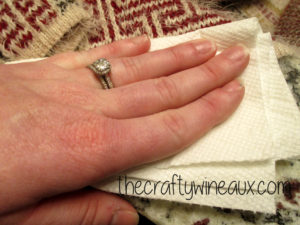
Give it a chance to air dry before you consider more drastic means; chances are you don’t need them! Just repeat step 2 a few times and let the garment air dry before moving on to heavier chemicals (like those in Chapter 2). As always, the name of the game is keep calm and NEVER put a garment in a dryer until you are 10,000% sure there are no traces of any stain left. This one is an exception because you wouldn’t even put this in the wash, but dryers set stains in forever and should ALWAYS be avoided.
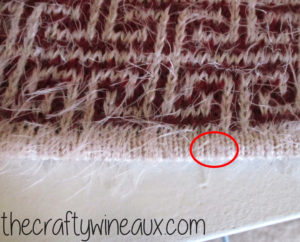
I couldn’t get the lighting quite right in the photo, but this stain was conquered and my alpaca shawl saved! Now onto the designer jeans I definitely stained the same night… sigh.
Click here to Check Out Chapter 2: Getting Red Wine Out of Designer Denim, and as always, drop me a comment if you have a stain for me. Domestic science is my passion project and I would love love love to save you from your most recent Merlot-mishap!
Wanna Learn to Get Red Wine Out of Other Things?Click the image to see other How-Tos! |

