

 How to make Steakhouse-Quality Filet Mignon at Home
Redding and I have been students as long as we’ve been together, and unfortunately, our tastes for awesome steaks have always FAR outweighed our budgets. A few years ago we set out on a mission to figure out how to make epic filet mignon at home so we could escape the wrath of $100+ dollar date nights while still filling the steak-y void in our hearts. After lots of practice, we’ve absolutely nailed it! We can take a Kroger bought filet and make it salty and crispy on the outside, perfectly medium rare on the inside, and with the buttery-soft texture of a beautifully aged piece of meat, and there’s actually few restaurants in Lexington that can do it better. So if you want to have an epic filet-night for around $30 (including wine! ![]() ), then I suggest you keep reading!
), then I suggest you keep reading!
Ingredients:
- 1 6-10 oz Filet per person (read Step 1 below on how to best select them.
- Sea Salt Grinder
- Garlic and Pepper Grinder
- meat tenderizer
– WITH NO SALT ADDED!!
- Tony Chachere’s Original Creole Seasoning
Directions:
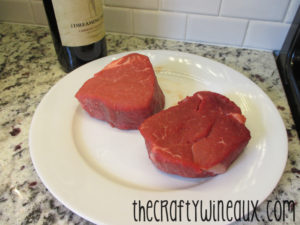
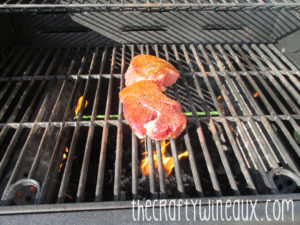
Step 1: Go buy your meat. When it comes to filet, thicker in height is more important than thicker in girth – it really simplifies getting an even temperature, nailing the perfect temperature, and it certainly looks the prettiest. If you’re cooking more than one at a time, they need to be the same size if possible, but most importantly the same thickness so that they cook evenly. Shoot for spidery marbled fat spanning throughout the cut over large chunks of fat in the middle/on the edges of the cut. It’s ok for there to be some white fat on the edges – most of it melts away. In the photo below, I would have picked the left cut over the right every day, my options were just limited on this particular shopping trip and I didn’t feel like being rude to the meat guy. Don’t forget, it’s always ok to buy 1 perfect, but large, steak and split it!
Step 2: Set your meat out on the counter and leave it to come up to or at least close to room temperature. This can take anywhere from 1-2 hours depending on the thickness. I realize you food safety nazis don’t like this, but the nature of this cut means that, unlike cuts like ground beef, only the outer-most faces of the meat have potentially come in contact with things that can make you sick – and we burn the hell out of those at the beginning, promise. Bringing your meat up in temperature before cooking is the ONLY way to achieve a true medium rare finish which is what most of us crazy steak people are craving.
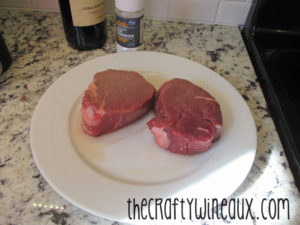
Step 3: Real chefs and die-hards will tell you this next step is blasphemous, but since most of us don’t have a meat aging cellar and can’t afford a butcher that does, we have to get creative at getting that rich “aged” flavor into our grocery store meat. To do this, the common folks like us use meat tenderizer. 5-10 minutes before starting to grill, moisten the meat with water and then sprinkle a decent amount of meat tenderizer on both sides. Should be a little heavier than you would with salt (see above).

Step 4: FORK IT!! Use a fork and semi-violent stabbing motions to distribute the tenderizer, focus heavily on the overly marbled sides/anything that resists you more than the other spots. Flip, repeat, then flip back to the first side and use your hands to “mold” the meat back into the shape it was – tenderizing makes it a little ugly and amorphous. Let it hang out for 5-10 minutes, then preheat your grill and get seasoning!

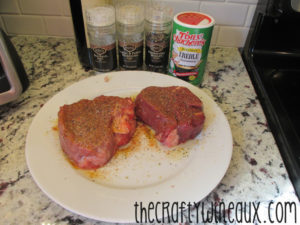
Step 5: After the meat has tenderized for ~5 minutes, preheat your grill on High (about 5 minutes) because it needs to be at searing temperature. While you wait for it to get hot, season your steaks. Part of what makes this steak so good is that it’s juicy on the inside, but that the outside has a salty crisp to it. The good “crisp” on the outside of a steak (not burned crisp) is caused by the fats in the steak being liquefied and heated to a temperature that literally “fries” the very edges of the steak. Since filet has minimal to no fat to speak of, we’ve accomplished this by brushing both sides with a small amount of melted butter – it also helps the seasonings hang on really well. As for seasonings, I use a small amount of fresh ground pepper, some of the ground pepper/garlic blend that I love, and a shake of Tony Chachere’s Cajun Seasoning. Don’t let this freak you out! All steakhouses have their own seasoning blends, and essentially all of the spices that places like Outback boast are in their “secret seasoning” are in this one blend. It’s most prominent flavor is salt, so use sparingly as if you were sprinkling on just salt – you can always add more on the other end. I promise it won’t be spicy, cajun-y, or taste like a hamburger – gotta trust me on this one! We like a little extra salt, so we add a smidgen of ground sea salt to each side.
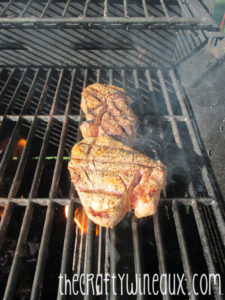
Step 6: Take the steaks out to the grill and sear both sides for about a minute.
Step 7: After searing both sides, Redding turns the grill down to ~25-30% heat and “bakes” the steak for 2 minutes on each side. By “bake” we simply mean not over open fire. The thermometer on the grill reads about 400 degrees F at this point, and getting this right relies on you knowing your own grill, how to avoid its hot-spots, and limiting flareups. Other blogs have referenced “ideal internal temperatures” for determining done-ness, but we’ve never had luck getting the perfect medium rare doing that. We do the classic, un-advanced mini cut and peek to determine done-ness. You can always put it back on if it’s not done, but you can’t undo it.
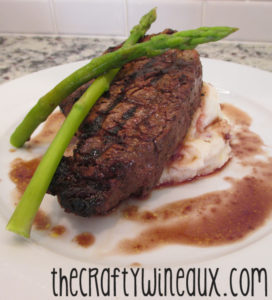
Step 8: Enjoy! We like ours served over garlic whipped mashed potatoes, with my red wine reduction sauce, and served with grilled asparagus! Definitely pair with a heavy tannin wine like a Cabernet.

