

How to Roast Pumpkin Seeds the Right Way – An Experiment
I grew up in one of those houses – the ones where pumpkin carving involved setting the seeds aside and dad would wash then roast them while we “carved” pumpkins. As with most families with small children, carving for us involved doodling a convoluted Sharpie design onto a sticky, poorly-cleaned pumpkin and waiting for dad to do the knife work. But we were all such seed fiends, that this generally ended with us bailing half an hour in to go eat all of his prized seeds while he was unceremoniously stuck with finishing our pumpkins for us. Hindsight is 20:20, so I’m sorry dad!
As I aged, my love for the seasonal salty delight never subsided, and even though we don’t always carve pumpkins anymore, I do always hack a handful of them up for seeds and to make pumpkin puree for treats like pumpkin spice bread every year. We’ve even picked up extra pumpkins the day after Halloween or the scary/crappy ones they put on sale just for the seeds!
This year I tried something new. I read so many different articles and blog posts about how to cook them, at what temperature to cook them, whether to read them a bedtime story while they were in the oven – it is literally ridiculous how far from a consensus we are on how to best handle these things. So being the scientist that I am, I set out to, in the infamous words of Matt Damon on Mars, “Science the s**t out of this”, so cracked open three pumpkins, cleaned and mixed the seeds (proper variable control, dontcha know), and set out to run an experiment. The middle school science fair down the street should give me a ribbon for this crap, y’all.
Dad used to do them rinsed, dried a little, with butter and salt at 325 for 45 minutes to an hour, but everyone seems to subscribe to their own theology on how to cook these suckers. I read a bunch, and there were two prominent variables that I decided to test: low temperature (325) versus high (400), and boiled ahead of time or dry roasted. There’s a clear winner in Redding’s and my minds, so we encourage you to follow our experiment and decide which you like the best. I only did these tossed in butter and salt for the sake of experimentation, because it’s totally not fair to try and compare flavors across cooking methods if you added any different spices. Gotta compare apples to apples. We can have fun with flavors later – step one is to get cooking these on a basic level down to a science.
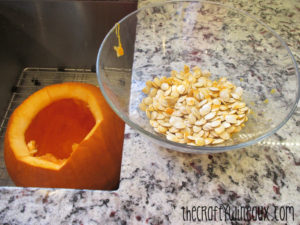
You don’t have to use multiple pumpkins to do this. One is more than enough to decide which cooking method you like the best. Then you can go back to the store and try again using the technique you like best. Since I used three (it was November 2nd and they needed to get off my porch), the first thing I did was to cut these things open and pull the seeds out and pool them. This time I actually had one of the ones I had used out front for a few weeks where a number of seeds had sprouted – my guess because it’s actually been stupid warm this year and the inside of that pumpkin was the perfect moist and warm incubator for those things to get started. I tested it and didn’t die, so don’t trash the pumpkin if this happens to you, just pick out the ones that have sprouted and toss them if you can sort the sprouts out of the goop. You can also grow them if you’re feeling up to it!

Before I toss them into the colander to rinse, I try my best to pick out the strings and bigger pieces that end up in with them since they tend not to rinse out of the colander.
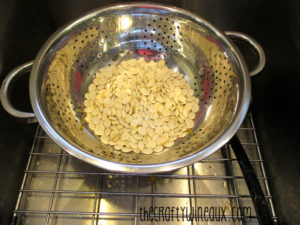
Then I washed them all in the colander to get all the creepy orange stuff off. Notice I haven’t separated them out into different cooking groups yet, and that’s because to this point, nothing is different and rule number two in science is to treat everything the same as best and as often as you can. Rule one is to write it all down so people can copy you if they need to. Go figure, lol!
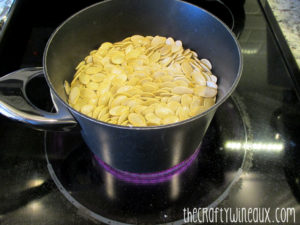
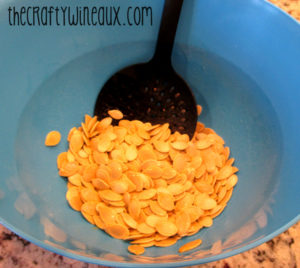
After I cleaned them, I split them in half. Half got dried haphazardly with a paper towel and set aside, and the other half went into salted boiling water for 10 minutes. When I pulled the boiling ones out, I used one of the spoons with the holes in the bottom to get the water out, but I didn’t dry then because the recipes I read didn’t call for that. Again, hindsight is always 20:20, I would have definitely dried them some to get some of the excess moisture off, but I’ll explain why that became problematic in a little bit.
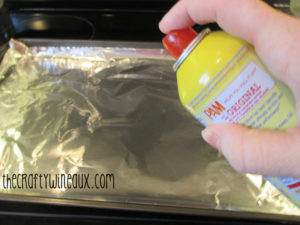
While all the boiling is going on I put foil over my cookie sheets to keep the pan from getting caked with baked on grease and then Pam my foil – Pam Original Cooking Spray
, not the baking specific version here. I don’t really care how you decide to cook these, but skipping the non-stick element causes completely unnecessary headaches at the end – DON’T DO IT! And contrary to popular belief, butter isn’t good enough in this context. With this amount of roasting, butter gets reduced to a really tacky glue and actually makes things worse rather than better.
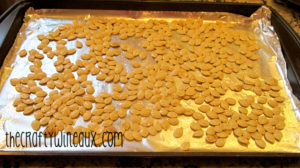
I tossed both piles of seeds in about ¼ cup of melted butter then spread them out onto to four pans that – one pan for 325 dry, one for 325 boiled, one for 400 dry, and one for 400 boiled – each with half of the just rinsed and half of the boiled seeds from the previous two steps.
I sprinkled ~1 teaspoon of really fine grain salt – I like the Super Fine-Grain Popcorn Salt because I find it goes farther with less. Depending on how many seeds you have – and we all know this varies from pumpkin to pumpkin – I’d say about 1-2 tablespoons of butter and maybe a teaspoon of salt per pumpkin. One of these three had as many seeds as the other two combined, so I ramped it up a bit. As always, you can absolutely add more of these things, but it’s literally impossible to take them away, so add later once you’ve tasted it.
I put the two 400 pans in first because I was hungry and figured they’d go faster. For consistency, every pan was turned every five minutes so they browned more evenly.
I recommend determining this by having one every time you turn them. Seeds vary in size based in pumpkin species, size, day of the week, phase of the moon, and a variety of other factors only God can control, so this is actually on a case by case basis. This is also a great time to decide if you want to add more salt or not. The salt flavor shines through heaviest towards the end, so wait until they’re at least dry on the exterior of the seed to decide if you want more salt. Lovely thing about the popcorn salt too is that it sticks to things really well – better than regular grain salt. You can actually wait until all is said and done to add more, which is great because the people eating them can salt to their preference.
Cooking times:
The seeds that were just dried and roasted at 400 were done in a little over 30 minutes.
The seeds that were boiled then roasted at 400 took about an hour to cook – they were very wet for a long time in the oven which is why I would try to manually dry them some with a paper towel in the future.
The seeds that were just dried then roasted at 325 took a little over an hour.
The seeds that were boiled than roasted at 325 took over an hour and a half to get crispy.
The important part, THE TASTE TEST:
So my apologies to those of you who subscribe to the theology of lower temperature, longer time – it didn’t make a heap of difference in how they tasted compared to the 400 seeds. I actually found the 400 versions of each to be on the crisper side, so there’s really no reason to do the lower temperature unless you like to make yourself suffer and wait in anticipation. Do know that rotating them often at the any temperature is a must so they don’t get overdone on any side.
Also, my apologies to my father, who has been a dry roaster my whole life – I found the pre-boiled seeds to be better. They were slightly crisper, and had more of a roasted flavor to them. Redding picked those too.
So moral of this story:
- Boil in salted water for 10 minutes.
- Dry them manually with paper towels
- Toss them in 1-2 tablespoons of melted butter
- Pour them onto a Pam-ed cookie sheet no more than 1-2 seeds thick.
- Sprinkle with ~1 teaspoon of Super Fine Popcorn Salt
- Roast at 400 for around an hour, or until yours are dry-crispy.
- Chow down.
Hopefully this was as informative for you as it was for us! I’d love to hear any thoughts you have. Next year’s experiment: fun new flavors!
Enjoy!

