


How to Make Your Own Homemade Pumpkin Puree
Perfect for making all of your favorite fall desserts using your leftover Halloween pumpkins!
Homemade pumpkin-based desserts and pastries are everyone’s favorite fall treat to pair with everything from Thanksgiving turkey to the infamous #PSL you can’t deny enjoying all season long. The difference between ordinary and extraordinary desserts is using fresh pumpkin puree rather that that year-old canned stuff from the grocery store. To make my famous Pumpkin Spice Bread, I only use fresh rendered pumpkin puree that I make every year.
I generally like to do this with a jack-o-lantern pumpkin because they have more fiber and less sugar content which gets the bread at the right sweetness every time and helps give it some structure. Plus I get to reuse the uncut one right off my patio every year rather that tossing it! You can do this with a pie pumpkin, but you’ll get a much thinner puree and a whole lot less of it.
Just to be COMPLETELY clear: this is for pumpkins that have not been cut or carved or have begun rotting. Once you cut into these things, you may as well be setting a petri dish out on your front porch.
Directions:
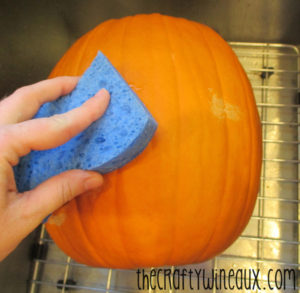
Step 1: Clean the exterior of your pumpkin with a little soap and water. Take this chance to check for any soft or moldy spots around the skin, stem, etc. If you find a soft spot, don’t panic yet, but note where it is so you can figure out if it goes all the way through or is just on the outside.
Step 2: Cut into the pumpkin by removing the stem first. If there were any soft spots, check them out on the inside. If the rot goes all the way inside or if there’s any fuzzy white mold growing on the inside, trash it an get another. A $5 pumpkin isn’t worth giving people G.I. distress. If you have a really shallow soft spot, cut the whole section out that it’s in.
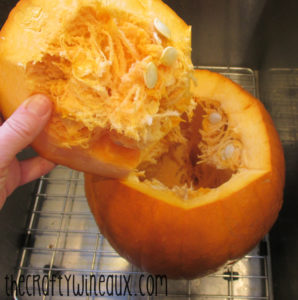
Step 3: Remove the seeds and goop using whatever method you prefer. Be sure to set the seeds aside because they’re awesome roasted – recipe coming soon!! My favorite method is to get the bulk and the seeds out and then to finish cleaning it once I’ve cut it into the slices.
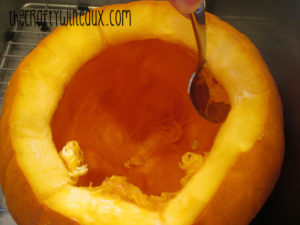
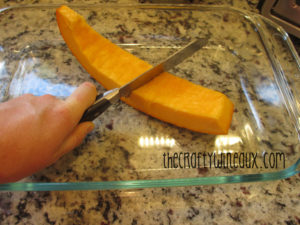
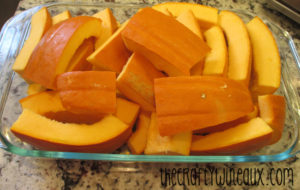
Step 4: Cut the pumpkin in half, get the woody section of the bottom cut out and then cut each half into ~1-2 wide strips. This is the step where I get the rest of the stringy goo out because it gets gross if you leave it on. I usually use a spoon, but a peeling knife works too. Obviously, be very careful during these cutting steps. Fingers rock, and they’re even better attached. Once clean, I cut each strip in half…
…and then pile them into a Pyrex dish. This pumpkin fit completely in a standard Pyrex: Pyrex 4.8 Quart Baking Dish and it was a medium jack-o-lantern. Some of the larger ones you may need two dishes. to pull it off. They don’t all need to be touching the bottom or facing a certain direction, just get it in a way that you can cover it with aluminum foil.
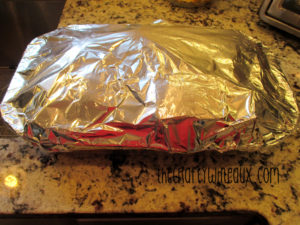
Step 5: Add ~1/4″ of water to the bottom of the dish and then cover it with aluminum foil. The foil helps keep the pumpkin from drying out or the edges getting burned, and the water helps breakdown some of the more structured parts of the pumpkin meat and also keeps it all moist during the slow-roast. Bake it on a middle rack at 350 degrees for an hour.
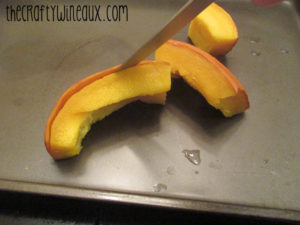
Step 6: Let it stand uncovered for ~10-20 minutes so it can cool some before peeling – hurts like a mother if you try to power through… Then use a knife and a solid surface to carefully separate the skin from the pumpkin meat. This usually happens really easily, like cutting soft butter – if not consider cooking it longer. Be sure not to leave any of the skin on, it becomes a landmine in the final dessert. If you did get any brown corners, trim and trash those too. I find it’s better not to be a hero and leave a little meat on each piece of skin so it’s less of a pain. You will not be for a lack of puree!!
Step 7: Pile all of the cooked meat into a blender (or however much it’ll hold at a time), or you can put it into a stick mixer-proof container like I did. My new Cuisinart Smart Stick Hand Blender is waaaaaaayyyyyyy faster than using the blender, so I do it this way now.
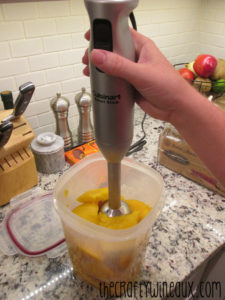
After a combination of mashing, blending, stirring, and blending again…

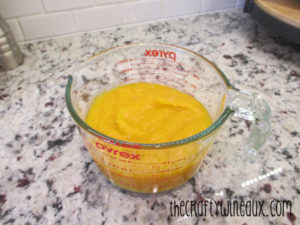
you end up with this beautiful, smooth, fresh pumpkin puree! Store it in your fridge up to a week, or it can also be frozen (I used to save a stock for next year in the freezer for when the pumpkin craving hits mid-August), or canned (my new favorite way to preserve it!). Be sure to bake a fresh loaf of Pumpkin Spice Bread with yours! More amazing pumpkin puree recipes coming soon!

